Note: These instructions explain how to build a SAMD51 ChatterBox Communicator. We are currently moving toward using SAMD51 for Nodes and other devices that don’t have a screen/UI. Instuctructions for building a SAMD51 node are forthcoming, and essentially the same as what you see here, minus the touchscreen and eyespi component.
Building a SAMD51 device will offer you the most flexibility and use the least power. This platform is especially well-suited for nodes or devices where you don’t care about a UI/screen. For devices where you’ll be using the UI a lot, you probably want to go with a T-Deck or T-Deck Plus build. If you are not familiar with soldering and building/modifying electronic devices, you will probably have a hard time with this project. However, if you are comfortable with those things, or very patient and can learn, you may enjoy this project
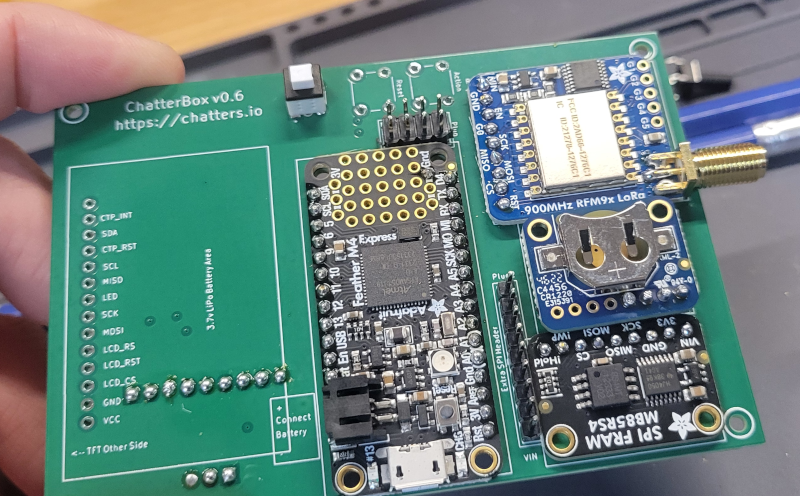
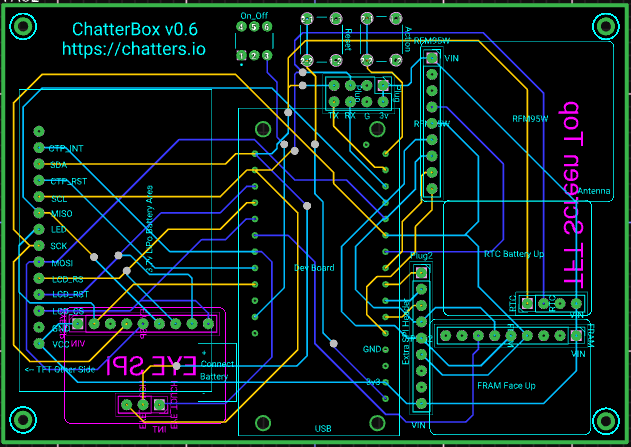
Whether building a node or communicator, the instructions for SAMD51-based devices are nearly identical. The only difference is whether you include a screen/display or not. The screen tends to be the most expensive part of this device (and most power-hungry component), so if you are actually wanting a node or remote switch, there’s no reason to include a display.
I don’t currently sell these custom PCBs, but I have included links to gerber files below, so you can have PCBs printed for yourself at low cost.
After assembling one of these, you’ll need to flash the device with the SAMD51 version of ChatterBox firmware.
| Download PDF of build instructions | ||
| View build instructions at maker.pro | ||
| Download fritzing file | ||
| ChatterBox Gerber Files for PCB printing | PCBWay or Seeedstudio are who I’ve used with success | |
| “Backpack” Gerber Files – Add-on PCB for GPS/etc | PCBWay or Seeedstudio are who I’ve used with success |
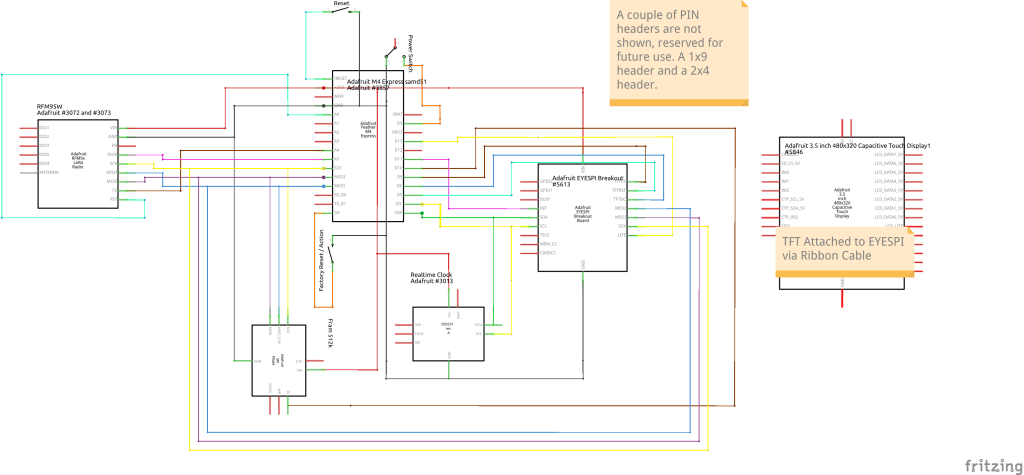
View Schematic